Security is as essential as the content and SEO of your website, and thousands of websites get hacked due to misconfiguration or lack of protection. If you are a website owner or security engineer and looking to protect your website from Clickjacking, code injection, MIME types, XSS, etc. attacks then this guide will help you. In this article, I will talk about various HTTP Headers (recommended by OWASP) to implement in multiple web servers, network edge & CDN providers for better website protection. Notes:
You are advised to take a backup of the configuration file prior to making changes Some of the headers may not be supported on all browsers, so check out the compatibility before the implementation. Mod_headers must be enabled in Apache to implement these headers. Ensure the following line uncommented in httpd.conf file.
Post-implementation, you can use the secure headers online tool to verify the results.
Using WordPress?: you may want to try using the HTTP Headers plugin, which takes care of these headers and a lot more. Let’s get it started…👨💻
HTTP Strict Transport Security
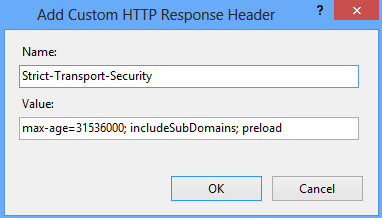
HSTS (HTTP Strict Transport Security) header to ensure all communication from a browser is sent over HTTPS (HTTP Secure). This prevents HTTPS click-through prompts and redirects HTTP requests to HTTPS. Before implementing this header, you must ensure all your website page is accessible over HTTPS else they will be blocked. HSTS header is supported on all the major latest version of a browser like IE, Firefox, Opera, Safari, and Chrome. There are three parameters configuration. So let’s take an example of having HSTS configured for one year, including preload for domain and sub-domain.
Apache HTTP Server
You can implement HSTS in Apache by adding the following entry in httpd.conf file Restart apache to see the results
Nginx
To configure HSTS in Nginx, add the next entry in nginx.conf under server (SSL) directive As usual, you will need to restart Nginx to verify
Cloudflare
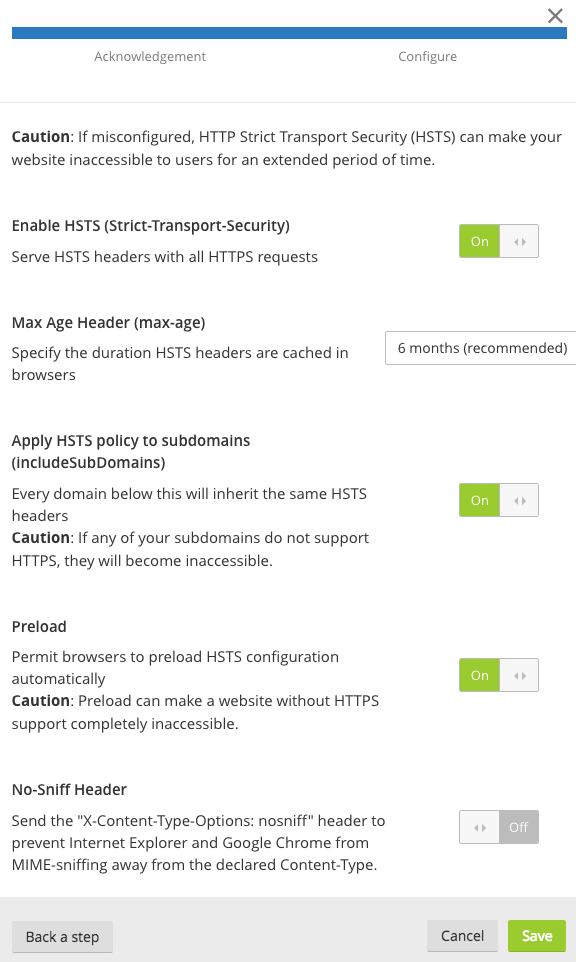
If you are using Cloudflare, then you can enable HSTS in just a few clicks.
Log in to Cloudflare and select the site Go to the “Crypto” tab and click “Enable HSTS.”
Select the settings the one you need, and changes will be applied on the fly.
Microsoft IIS
Launch the IIS Manager and add the header by going to “HTTP Response Headers” for the respective site.
Restart the site
X-Frame-Options
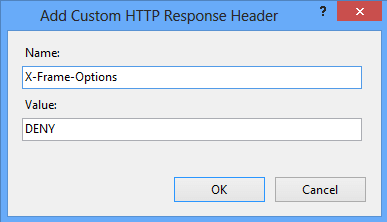
Use the X-Frame-Options header to prevent Clickjacking vulnerability on your website. By implementing this header, you instruct the browser not to embed your web page in frame/iframe. This has some limitations in browser support, so you got to check before implementing it. You can configure the following three parameters. Let’s take a look at how to implement “DENY” so no domain embeds the web page.
Apache
Add the following line in httpd.conf and restart the webserver to verify the results.
Nginx
Add the following in nginx.conf under server directive/block. add_header X-Frame-Options “DENY”; Restart to verify the results
F5 LTM
Create an iRule with the following and associated with the respective virtual server. You don’t need to restart anything, changes are reflected in the air.
WordPress
You can get this header implemented through WordPress too. Add the following in a wp-config.php file If you are not comfortable editing the file, then you can use a plugin as explained here or mentioned above.
Microsoft IIS
Add the header by going to “HTTP Response Headers” for the respective site.
Restart the site to see the results.
X-Content-Type-Options
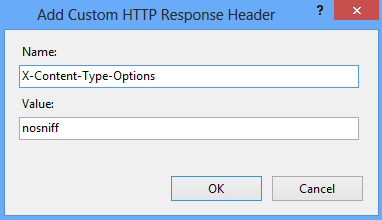
Prevent MIME types of security risk by adding this header to your web page’s HTTP response. Having this header instructs browser to consider file types as defined and disallow content sniffing. There is only one parameter you got to add “nosniff”. Let’s see how to advertise this header.
Apache
You can do this by adding the below line in httpd.conf file Don’t forget to restart the Apache webserver to get the configuration active.
Nginx
Add the following line in nginx.conf file under server block. As usual, you got to restart the Nginx to check the results.
Microsoft IIS
Open IIS and go to HTTP Response Headers Click on Add and enter the Name and Value
Click OK and restart the IIS to verify the results.
Content Security Policy
Prevent XSS, clickjacking, code injection attacks by implementing the Content Security Policy (CSP) header in your web page HTTP response. CSP instruct browser to load allowed content to load on the website. All browsers don’t support CSP, so you got to verify before implementing it. There are three ways you can achieve CSP headers.
Content-Security-Policy – Level 2/1.0 X-Content-Security-Policy – Deprecated X-Webkit-CSP – Deprecated
If you are still using the deprecated one, then you may consider upgrading to the latest one. There are multiple parameters possible to implement CSP, and you can refer to OWASP for an idea. However, let’s go through the two most used parameters. The following example of loading everything from the same origin in various web servers.
Apache
Get the following added in httpd.conf file and restart the webserver to get effective.
Nginx
Add the following in the server block in nginx.conf file
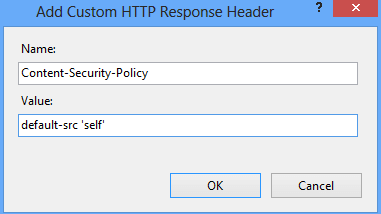
Microsoft IIS
Go to HTTP Response Headers for your respective site in IIS Manager and add the following
Check out this to implement frame-ancestors using CSP. This is an advanced version of X-Frame-Options.
X-Permitted-Cross-Domain-Policies
Using Adobe products like PDF, Flash, etc.? You can implement this header to instruct the browser on how to handle the requests over a cross-domain. By implementing this header, you restrict loading your site’s assets from other domains to avoid resource abuse. There are a few options available.
Apache
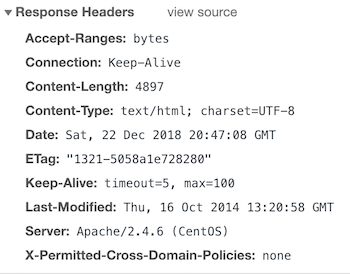
If you don’t want to allow any policy. You should see the header like the following.
Nginx
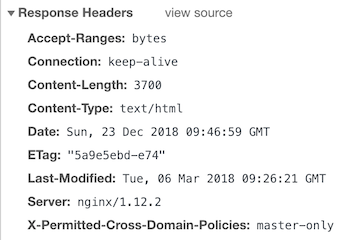
And, let’s say you need to implement master-only then add the following in nginx.conf under server block. And the result.
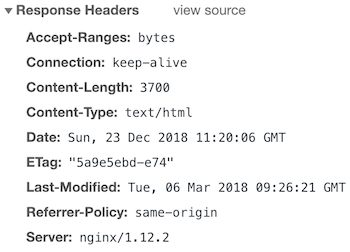
Referrer-Policy
Looking to control the referrer-policy of your site? There are certain privacy and security benefits. However, not all the options are supported by all the browsers, so review your requirements before the implementation. Referrer-Policy supports the following syntax.
Apache
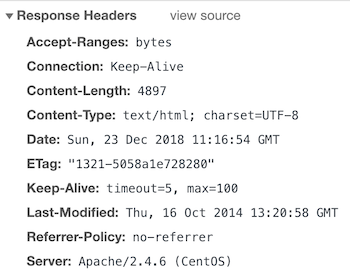
You can add the following if you want to set no-referrer. And after the restart, you should have in the response headers.
Nginx
Let’s say you need to implement the same origin, so you got to add the following. Once configured, you should have the results below.
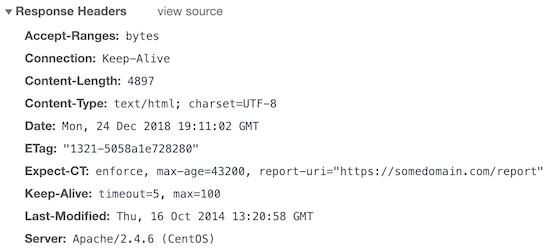
Expect-CT
A new header still in experimental status is to instruct the browser to validate the connection with web servers for certificate transparency (CT). This project by Google aims to fix some of the flaws in the SSL/TLS certificate system. The following three variables are available for the Expect-CT header.
Apache
Let’s assume you want to enforce this policy, report, and cache for 12 hours then you got to add the following. And, here is the result.
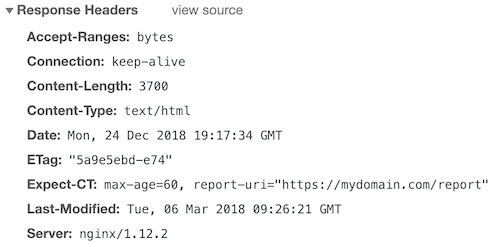
Nginx
What if you want to report and cache for 1 hour? The output would be.
Permissions-Policy
Earlier known as Feature-Policy, it is renamed as Permissions-Policy with enhanced features. You can check out this to understand the big changes between Feature-Policy to Permissions-Policy. With Permissions Policy, you can control browser features such as geolocation, fullscreen, speaker, USB, autoplay, speaker, microphone, payment, battery status, etc. to enable or disable within a web application. By implementing this policy, you let your server instruct a client (browser) to obey the web application functionality.
Apache
Let’s say you need to disable the fullscreen feature and to do so, you can add the following in httpd.conf or apache2.conf file depending on the flavor of the Apache HTTP server you use. How about adding multiple features in a single line? That’s possible too! Restart Apache HTTP to see the result. The above code will instruct the browser to disable fullscreen and microphone. You may also disable the feature entirely by keeping the allowlist empty. For example, you can add the following to disable the geolocation feature. This would output on the browser like below.
Nginx
Let’s take another example – disable vibrate feature. Or, disable geolocation, camera, and speaker. Here is the output after restarting Nginx. All the Nginx configuration goes under http block in nginx.conf or any custom file you use.
Clear Site Data
As you may guess by the name, implementing a Clear-Site-Data header is a great way to tell a client to clear browsing data such as cache, storage, cookies, or everything. This gives you more control over how you want to store the website’s data in the browser.
Apache
Let’s say you want to clear the origin cache, you can add below. Which will output HTTP response as below. or, to clear everything.
Nginx
Let’s set Nginx to clear cookies. And, you will see the output below.
Conclusion
Securing a website is challenging, and I hope by implementing the above headers, you add a layer of security. If you are running a business site, then you may also consider using cloud-WAF like SUCURI to protect your online business. The good thing about SUCURI is it offers both security and performance. If you go for SUCURI WAF, you will find additional headers section under the Firewall » Security tab.
![]()
![]()


![]()
![]()
![]()
![]()

![]()


![]()
![]()
![]()

